US-Guided Breast Biopsy - Equipment and Setup
SuCB1137-US-Guided Breast Biopsy - Equipment and Setup
SuCB1137-US-Guided Breast Biopsy - Equipment and Setup
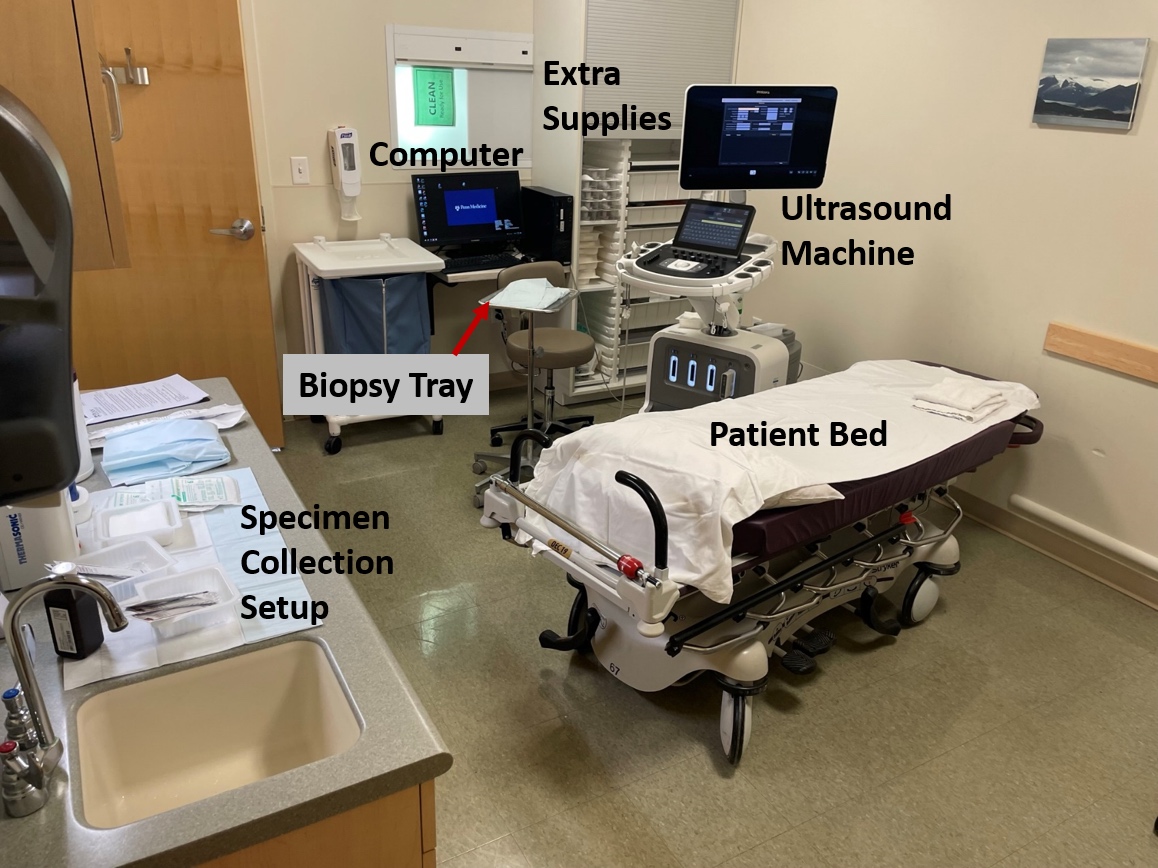
SummaryBiopsy Room Setup
Typical room setup for biopsy:
Computer Station: Prior ultrasound images can be viewed to make sure the correct lesion is biopsied.Ultrasound Machine: For visulization of the entire procedure.
Biopsy Table: Sterile setup for the biopsy.
Specimen collection setup: Nonsterile supplies for preparation and speciment collection.
Patient Bed: The orientation of the bed may be different depending on patient lesion laterality and biopsy approach.
Extra Supplies: All biopsy supplies can be found here.
US-guided breast biopsies should be performed with the linear transducer such as the following ultra-broadband linear array transducer:
- The long axis of the needle, especially the tip should be visible along the long axis of the transducer.
- High-resolution, linear-array, broad-bandwidth transducers are preferred for breast ultrasound examinations and percutaneous procedures.
- The transducers should be operated at the highest clinically appropriate frequency. Transducer frequencies of 12 MHz or higher are used for breast imaging and interventional procedures.
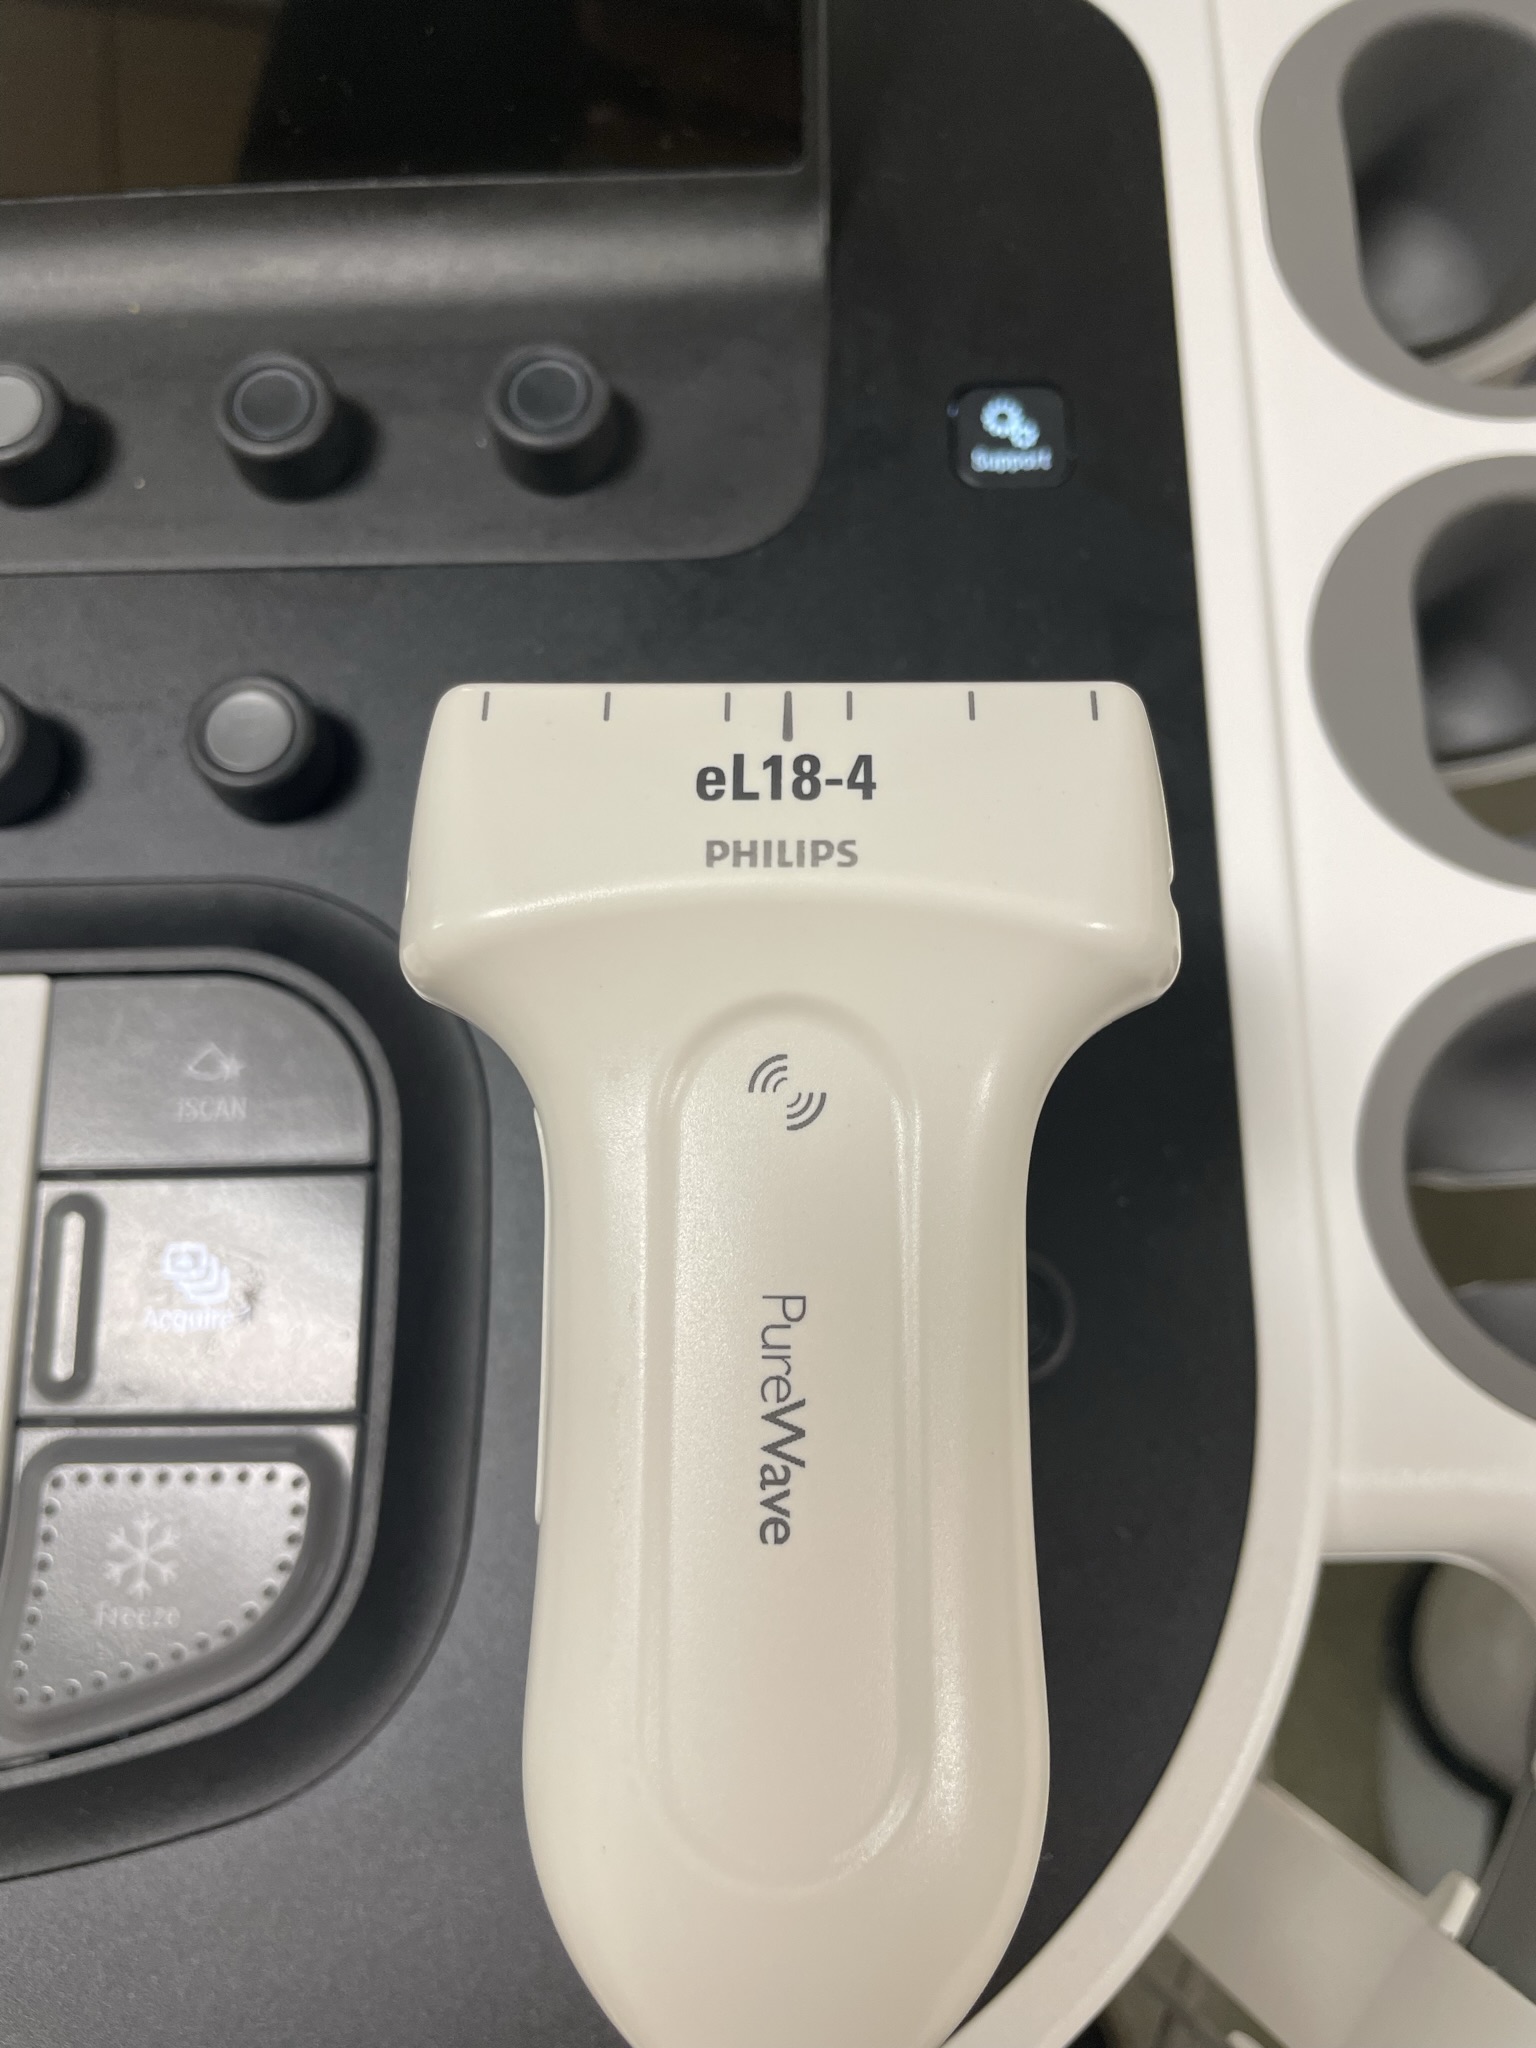
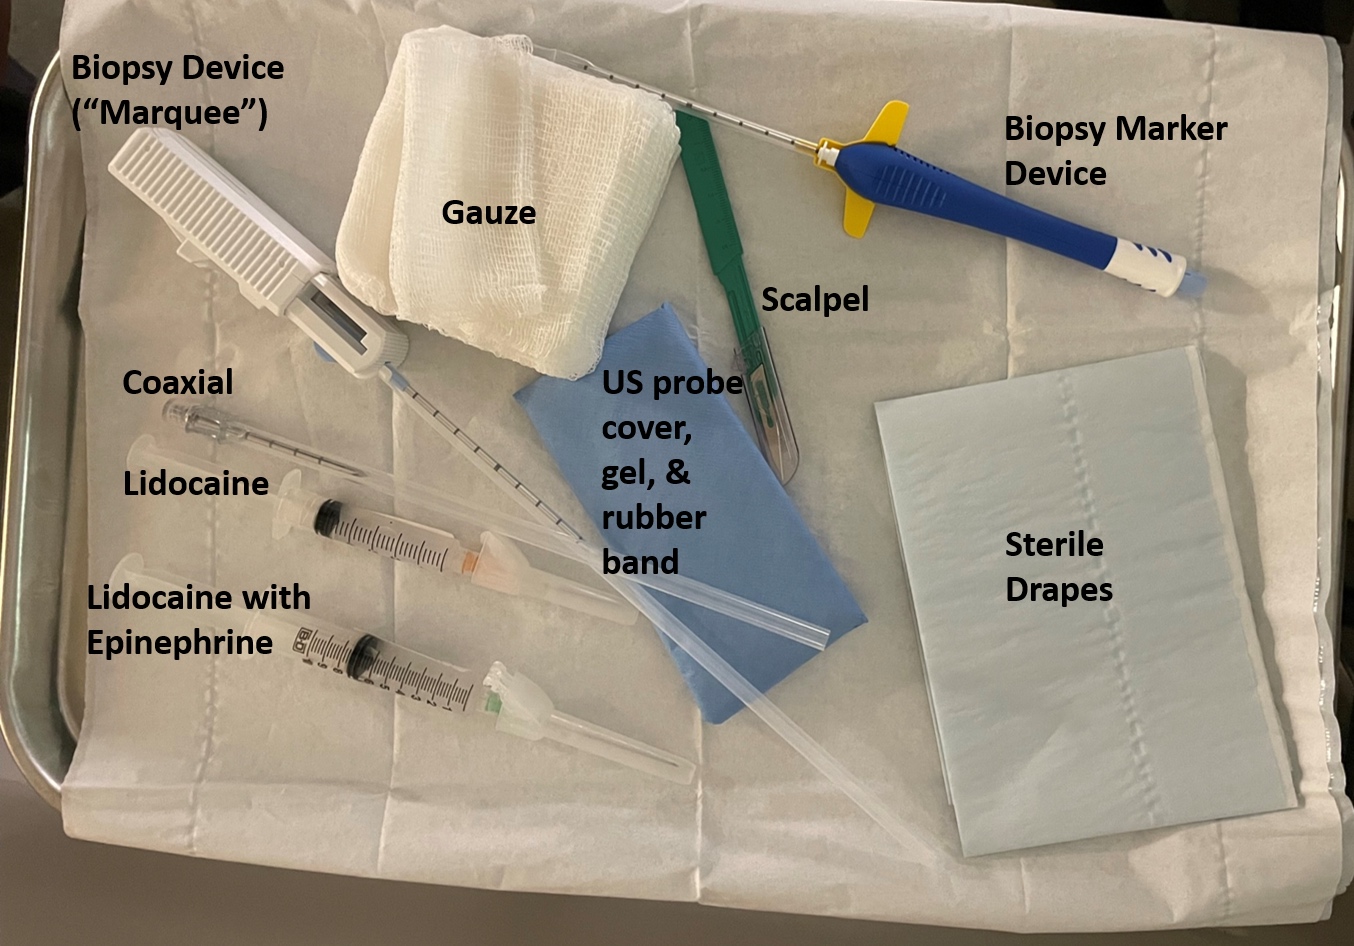
Table Setup for Biopsy and Specimen Collection
Here is a typical sterile biopsy table setup:
Biopsy Device: Several types are available depending on user preference and lesion.Coaxial: Serves as a guide needle for ease in taking multiple biopsy samples.
Lidocaine: For skin wheal and initial local anesthesia.
Lidocaine with Epinephrine: For deeper tissue local anesthesia with vasoconstrictive effects that decreases risk of bleeding.
Gauze: For keeping the biopsy site clean if there is bleeding.
US probe cover, gel, and rubber band: Sterile cover to place over the US probe and rubber band to hold the cover in place.
Scalpel: For making initial skin incision for ease of biopsy device insertion.
Biopsy Marker Device: For deployment of a titanium marker at site of biopsy.
Sterile Drapes: To cover areas adjacent to biopsy site to prevent contamination.
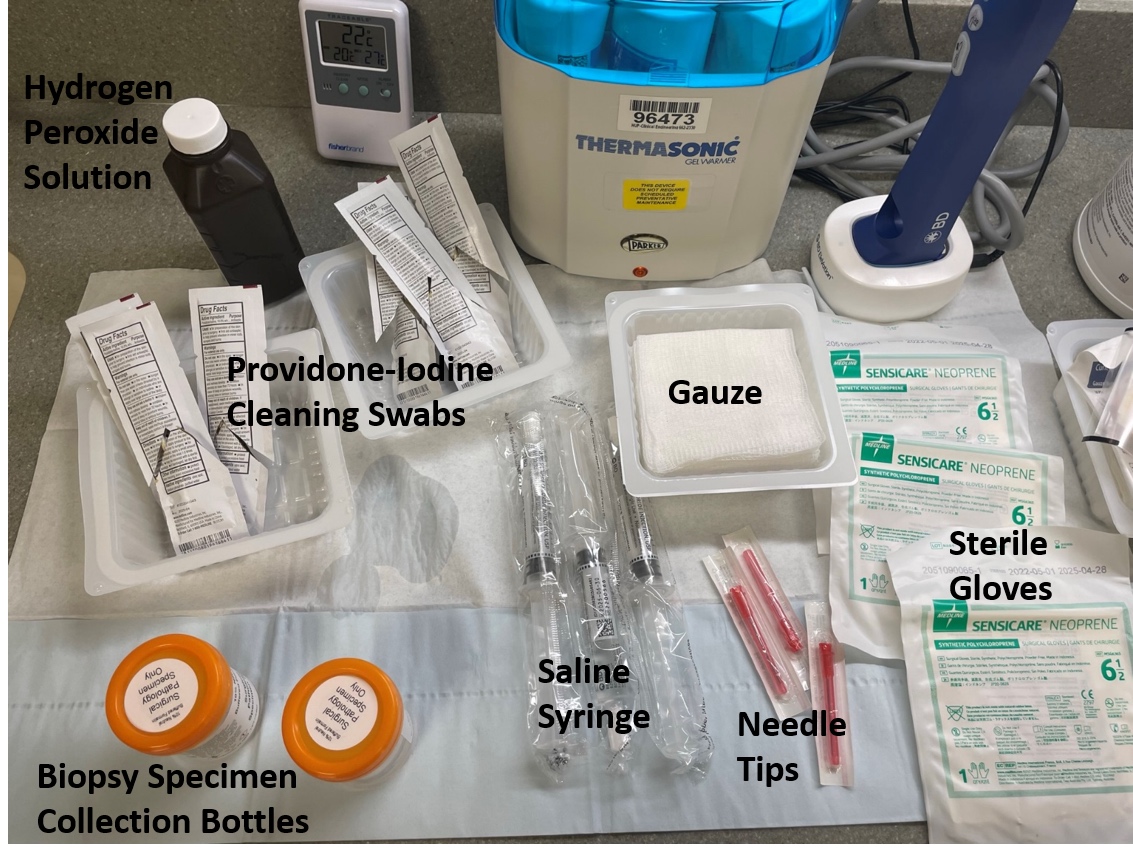
Here is a typical nonsterile table setup for preparation and specimen collection:
Introduction to Biopsy Devices - Marquee
Marquee™ Disposable Core Biopsy Instrument (Automated Spring Loaded)
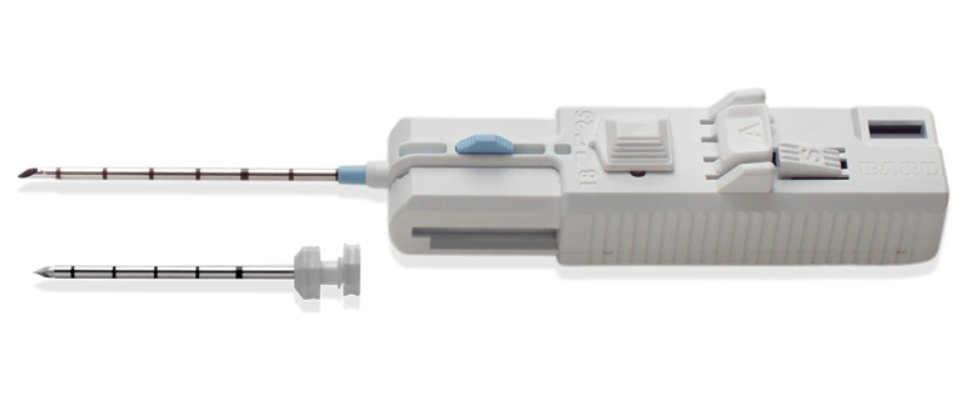
This is one of the most common biopsy device used for US guided breast biopsies.
It is a spring loaded disposable core biopsy device with an adjustable penetration depth and may be used with an co-axial as pictured above.
Here are the components of a Marquee biopsy device.

The Marquee allows you to choose between an 18 mm and 25 mm throw. You can select by sliding the switch as shown below:

Introduction to Automated Core Biopsy (Marquee)
Summary Steps for Marquee
Open Trough Biopsy:- Choose desired throw length
- Pull back on energizing slide once
- Press 'A' to Fire
- Choose desired throw length
- Pull back on energizing slide twice
- Press "A" to Fire
Introduction to Biopsy Devices - Celero®
Vacuum Assisted Core (Celero®)
The Celero® is a spring-loaded core device with integrated vacuum assisted component.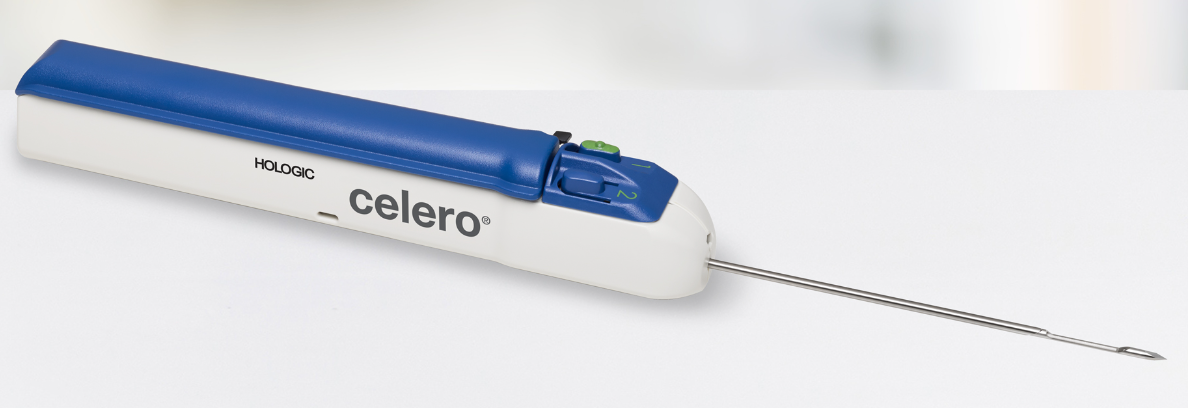
The main components of the Celero® include
- Black latch on the top left corner
- Handle lever
- Button "1" and "2"
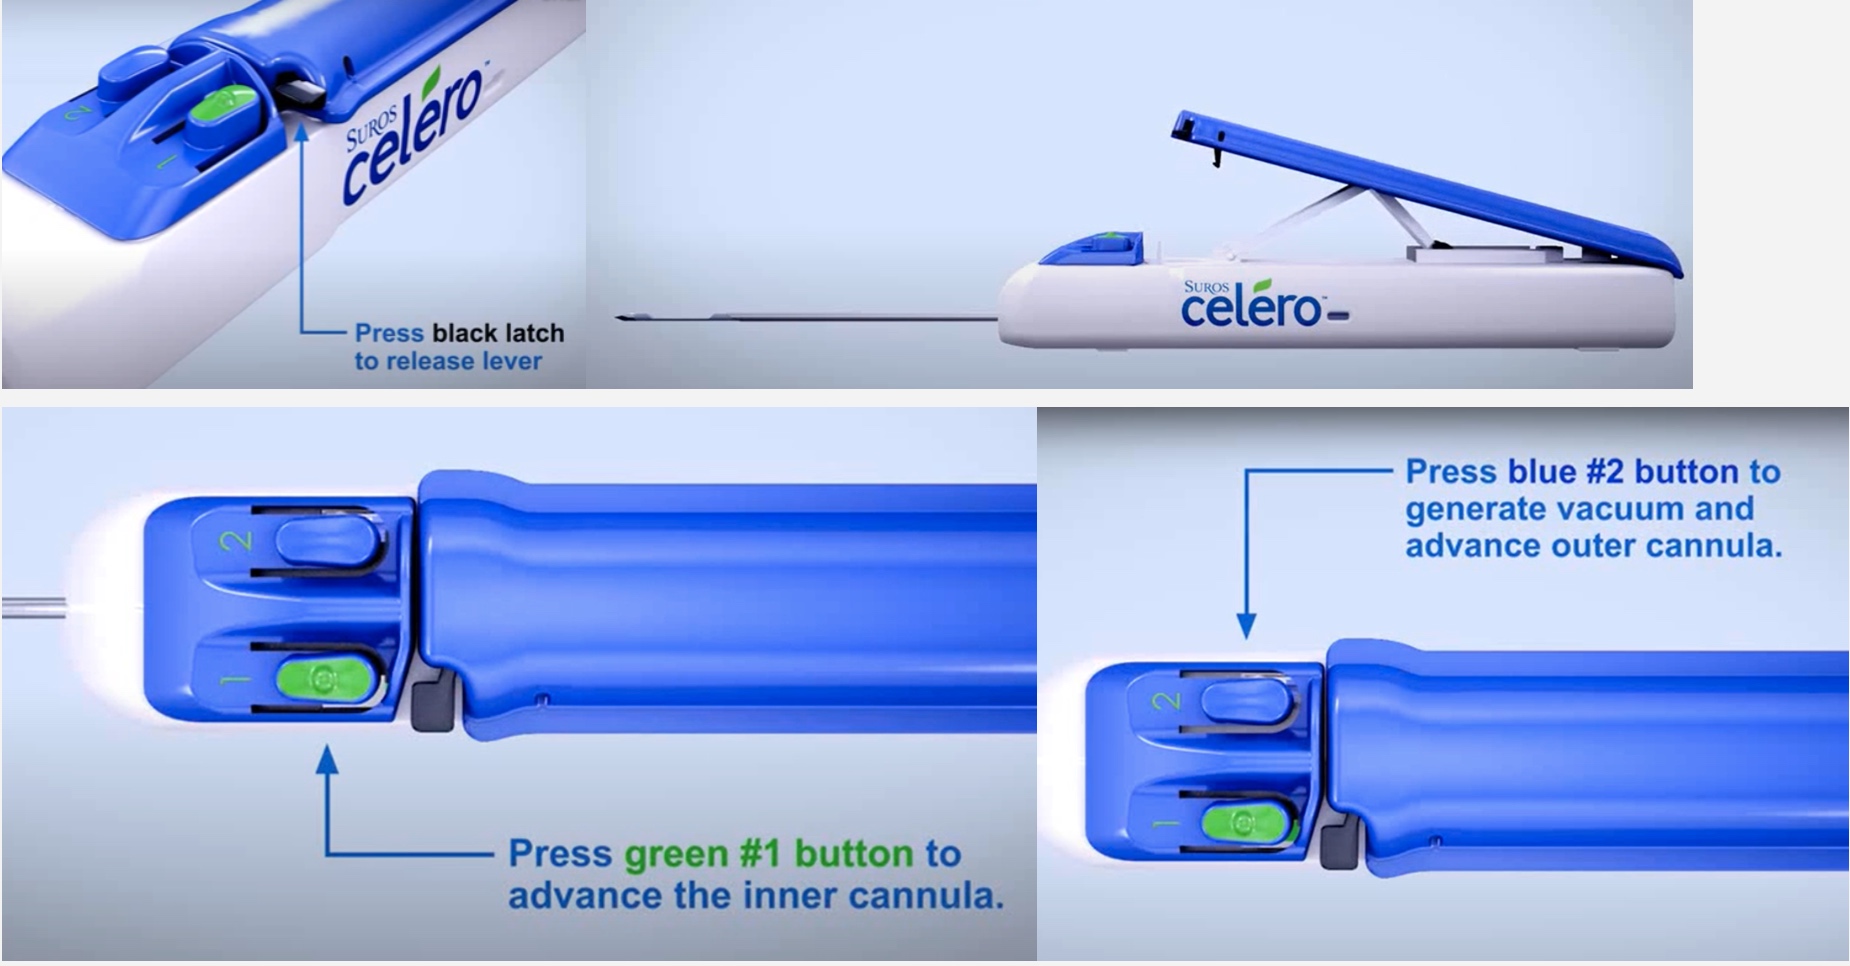
Celero® Demo Video
Summary Steps for Celero
Open Trough Biopsy:- Press black latch to open handle lever
- Prime by pressing lever 3 times
- Press "1" for open trough
- Press "2" to fire for biopsy
- Press black latch to open handle lever
- Prime by pressing lever 3 times
- Press "2" for prefire
- Press "1" to fire for biopsy
Intro to Biopsy Marker Device
Biopsy Marker Placement (Ultraclip™)

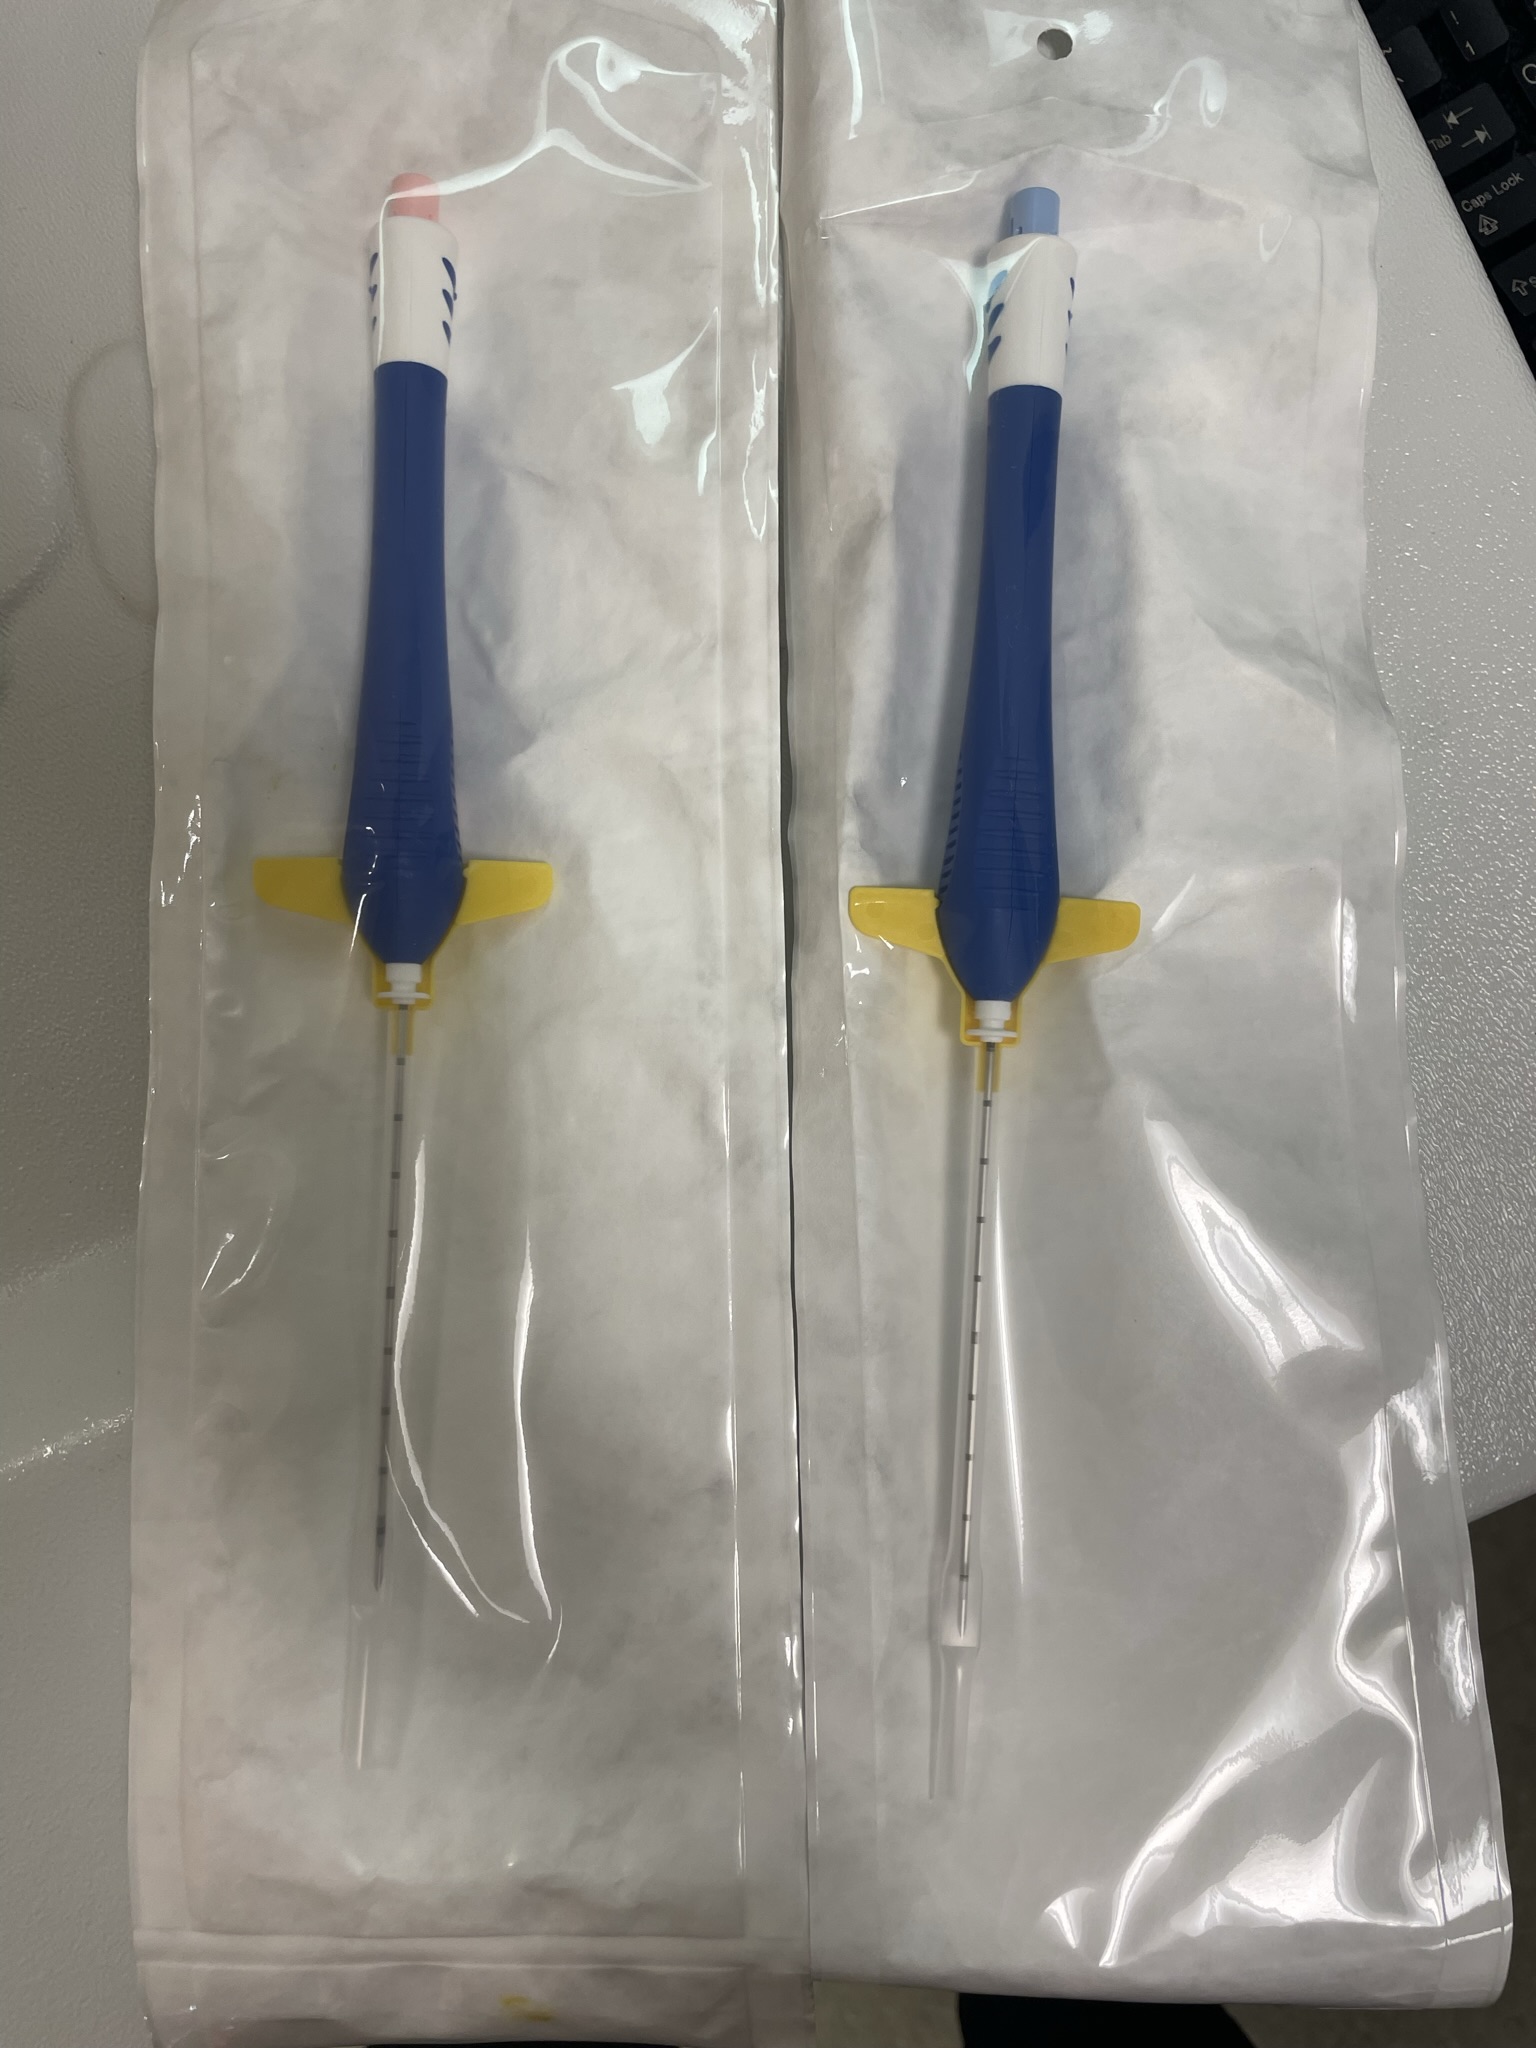
There is a choice of a front trigger and an alternate rear trigger. Most users find the front trigger to allow the greatest stability.
A biopsy marker with shape noted on package (see below) is located within the hollow needle ready to be deployed.
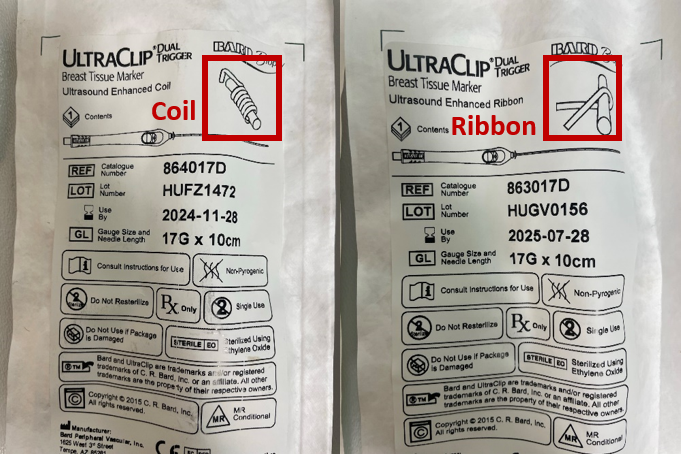
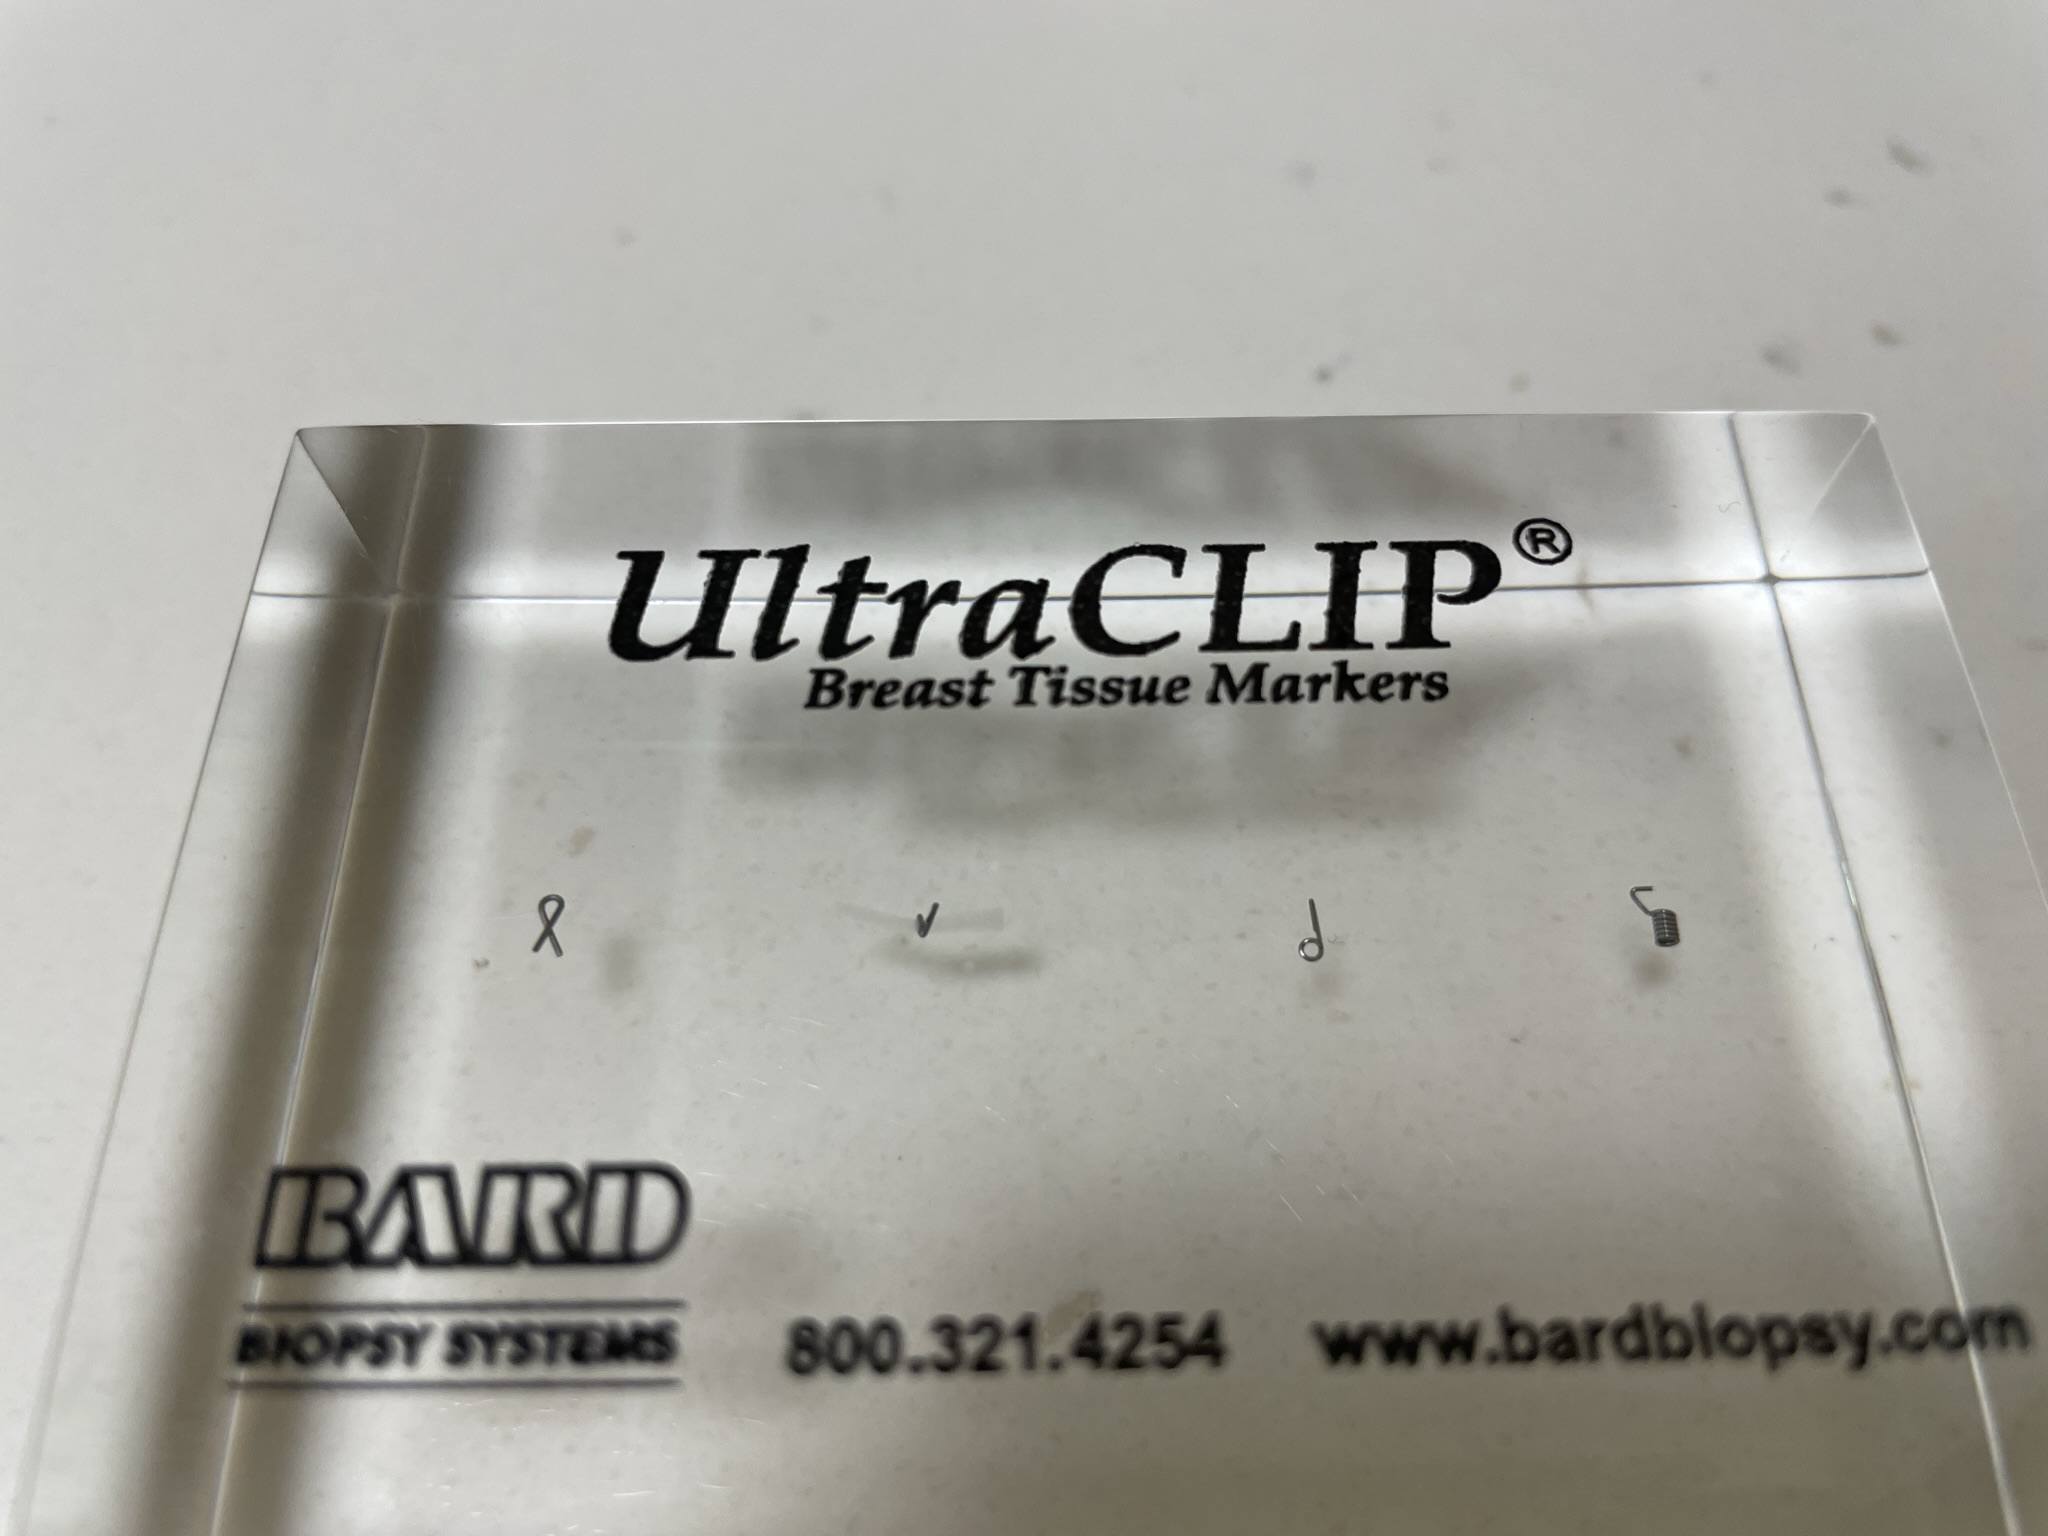
Several differently shaped markers may be placed with example images below.
Each is interwoven with non-absorbable polyvinyl alcohol (PVA) polymer for ultrasound visualization and helps it to stay affixed to breast tissue.
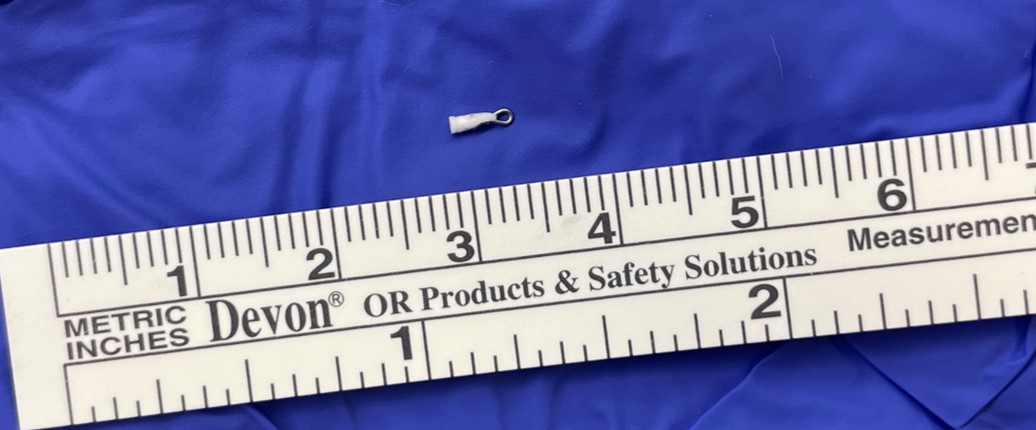
Here is an example of a biopsy marker that is deployed from the hollow needle. Note the small size!


There is a choice of a front trigger and an alternate rear trigger. Most users find the front trigger to allow the greatest stability.
A biopsy marker with shape noted on package (see below) is located within the hollow needle ready to be deployed.

Several differently shaped markers may be placed with example images below.
Each is interwoven with non-absorbable polyvinyl alcohol (PVA) polymer for ultrasound visualization and helps it to stay affixed to breast tissue.

Here is an example of a biopsy marker that is deployed from the hollow needle. Note the small size!

